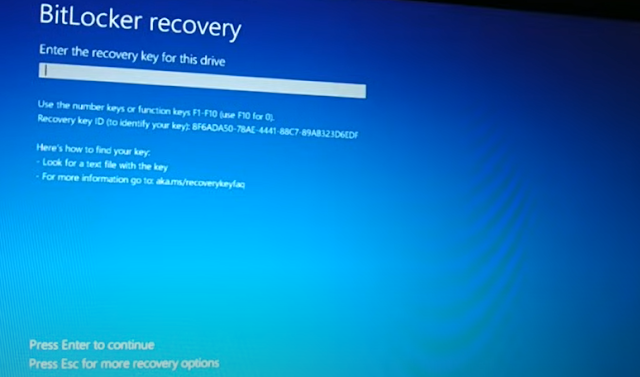
Forgot bit locker pin, forgot bit locker recovery key, 5 Easy ways to fix


Creating a simple web browser in Python can be done using the PyQt or PySide library, which provides bindings for the Qt application framework. These libraries allow you to create GUI applications, and specifically, you can use the `QWebEngineView` widget from the QtWebEngine module to display web content.
Here's a
step-by-step guide to create a basic web browser in Python using PyQt5:
### 1.
**Install PyQt5**
First, you
need to install PyQt5 and the QtWebEngine module:
```bash
pip install
PyQt5 PyQtWebEngine
```
### 2.
**Create the Web Browser Application**
Now, create a Python script for your web browser. Below is an example of a basic web browser application:
```python
import sys
from
PyQt5.QtWidgets import QApplication, QMainWindow, QVBoxLayout, QWidget,
QLineEdit, QPushButton, QToolBar
from
PyQt5.QtWebEngineWidgets import QWebEngineView
from PyQt5.QtCore
import QUrl
class
Browser(QMainWindow):
def __init__(self):
super().__init__()
# Set up the main window
self.setWindowTitle('My Web Browser')
self.setGeometry(100, 100, 1200, 800)
# Set up the browser view
self.browser = QWebEngineView()
self.browser.setUrl(QUrl("http://www.google.com"))
# Set up the navigation bar
self.navbar = QToolBar()
self.addToolBar(self.navbar)
# Add back button
back_btn = QPushButton('Back')
back_btn.clicked.connect(self.browser.back)
self.navbar.addWidget(back_btn)
# Add forward button
forward_btn = QPushButton('Forward')
forward_btn.clicked.connect(self.browser.forward)
self.navbar.addWidget(forward_btn)
# Add reload button
reload_btn = QPushButton('Reload')
reload_btn.clicked.connect(self.browser.reload)
self.navbar.addWidget(reload_btn)
# Add home button
home_btn = QPushButton('Home')
home_btn.clicked.connect(self.navigate_home)
self.navbar.addWidget(home_btn)
# Add URL bar
self.url_bar = QLineEdit()
self.url_bar.returnPressed.connect(self.navigate_to_url)
self.navbar.addWidget(self.url_bar)
# Update URL bar when the browser loads
a page
self.browser.urlChanged.connect(self.update_url)
# Set the central widget
self.setCentralWidget(self.browser)
def navigate_home(self):
self.browser.setUrl(QUrl("http://www.google.com"))
def navigate_to_url(self):
url = self.url_bar.text()
self.browser.setUrl(QUrl(url))
def update_url(self, q):
self.url_bar.setText(q.toString())
if __name__
== "__main__":
app = QApplication(sys.argv)
browser = Browser()
browser.show()
sys.exit(app.exec_())
```
### 3. **How
It Works**
- **Main
Window (`QMainWindow`)**: The application window.
- **Web
Engine View (`QWebEngineView`)**: The widget that displays web pages. It is set
to show Google's homepage by default.
-
**Navigation Bar (`QToolBar`)**: A toolbar that contains navigation buttons
(Back, Forward, Reload, Home) and an address bar (`QLineEdit`).
- **URL
Handling**:
- The `navigate_to_url` method is called when
the user presses Enter in the URL bar, setting the browser's URL to whatever is
typed.
- The `update_url` method updates the URL bar
whenever the browser loads a new page.
### 4. **Run
the Application**
Save the
script as `browser.py` and run it:
```bash
python
browser.py
```
This will launch a basic web browser window with a navigation bar that includes buttons for going back, forward, reloading, and going to the home page, as well as a URL bar.
### 5.
**Adding More Features**
This is just
a basic web browser. You can extend it by adding more features, such as:
-
**Bookmarks**: Implementing a bookmarks feature where users can save their
favorite sites.
-
**History**: Keeping track of the browser history.
- **Tabs**:
Adding tabbed browsing functionality using `QTabWidget`.
- **Custom
Styles**: Applying custom CSS to style the browser's UI.
### Summary
- **PyQt5**:
A Python library for creating desktop applications with a GUI.
-
**QWebEngineView**: A widget from the QtWebEngine module that renders web
content.
- **Basic
Functionality**: The browser includes navigation controls and a URL bar.
-
**Expandable**: You can add more features like bookmarks, history, and tabs.
This project
is a great starting point for learning more about GUI development in Python. If
you want to dive deeper into specific features or have questions, feel free to
ask!