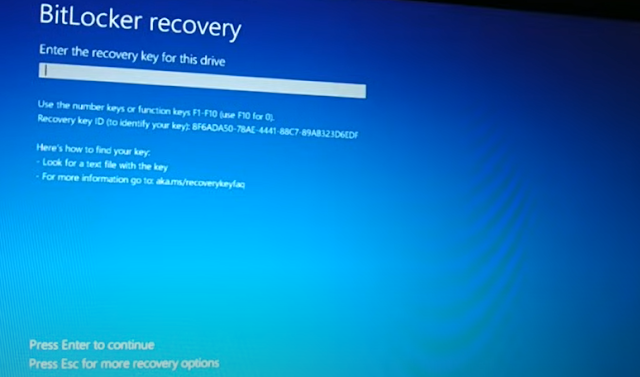
Forgot bit locker pin, forgot bit locker recovery key, 5 Easy ways to fix


Creating a web application in Python is a common task that can be accomplished using various web frameworks. One of the most popular frameworks for this purpose is Flask due to its simplicity and ease of use, especially for beginners. Here's a step-by-step guide to creating a basic web application using Flask:
### 1.
**Install Flask**
First, you
need to install Flask. You can do this using pip:
```bash
pip install
Flask
```
### 2.
**Create the Project Structure**
Create a
directory for your project and navigate into it:
```bash
mkdir
my_web_app
cd
my_web_app
```
Inside this
directory, you can organize your files like this:
```
my_web_app/
│
├── app.py
├── templates/
│ └── index.html
└── static/
└── style.css
```
-
**`app.py`**: The main Python file where your Flask application code will
reside.
-
**`templates/`**: Directory to store HTML templates.
-
**`static/`**: Directory to store static files like CSS, JavaScript, and
images.
### 3. **Write
the Flask Application**
In `app.py`,
write the following code to create a basic Flask application:
```python
from flask
import Flask, render_template
app =
Flask(__name__)
@app.route("/")
def home():
return
render_template("index.html")
if __name__ ==
"__main__":
app.run(debug=True)
```
-
**`@app.route("/")`**: This decorator defines a route for the home
page. When a user visits the root URL ("/"), the `home()` function is
called.
-
**`render_template("index.html")`**: This function renders the `index.html`
template from the `templates/` directory.
-
**`app.run(debug=True)`**: Starts the Flask development server. `debug=True`
means the server will automatically restart if you make changes to your code.
### 4.
**Create an HTML Template**
Create a simple
HTML file at `templates/index.html`:
```html
<!DOCTYPE
html>
<html
lang="en">
<head>
<meta charset="UTF-8">
<meta name="viewport"
content="width=device-width, initial-scale=1.0">
<title>My Web App</title>
<link rel="stylesheet"
href="{{ url_for('static', filename='style.css') }}">
</head>
<body>
<h1>Welcome to My Web App!</h1>
<p>This is a simple Flask
application.</p>
</body>
</html>
```
- **`{{
url_for('static', filename='style.css') }}`**: This is a Flask function that
helps link static files, ensuring correct paths.
### 5.
**Create a CSS File (Optional)**
You can add
some basic styling by creating a `static/style.css` file:
```css
body {
font-family: Arial, sans-serif;
text-align: center;
background-color: #f0f0f0;
margin-top: 50px;
}
h1 {
color: #333;
}
p {
color: #666;
}
```
### 6. **Run
the Flask Application**
To run the
application, navigate to the directory containing `app.py` and execute:
```bash
python
app.py
```
If everything
is set up correctly, Flask will start a development server, and you'll see
output like this:
```bash
* Running on http://127.0.0.1:5000/ (Press
CTRL+C to quit)
```
Open your
web browser and go to `http://127.0.0.1:5000/` to see your web application in
action.
### 7. **Add
More Functionality**
You can
expand your web application by adding more routes, templates, and logic. For
example, to add an "About" page:
1. **Add a
new route in `app.py`:**
```python
@app.route("/about")
def about():
return
render_template("about.html")
```
2. **Create
a new HTML template `templates/about.html`:**
```html
<!DOCTYPE html>
<html lang="en">
<head>
<meta charset="UTF-8">
<meta name="viewport"
content="width=device-width, initial-scale=1.0">
<title>About</title>
<link rel="stylesheet"
href="{{ url_for('static', filename='style.css') }}">
</head>
<body>
<h1>About This App</h1>
<p>This web application is built
using Flask.</p>
</body>
</html>
```
### 8.
**Deploying the Web Application**
For
deployment, you can use services like Heroku, AWS, or PythonAnywhere. These
platforms allow you to host your Flask application on the web.
### Summary
- **Flask
Installation:** `pip install Flask`
- **Project
Structure:** Organize your code with separate directories for templates and
static files.
-
**Routes:** Define URL routes with `@app.route()` to link URLs to specific
functions.
-
**Templates:** Use the Jinja2 templating engine to render HTML templates.
- **Run
Locally:** Start your application using `python app.py`.
-
**Deploy:** Host your application using a cloud service.
This is just
the beginning! Flask is powerful and can be used to build more complex web
applications with databases, user authentication, and much more. Let me know if
you want to dive deeper into any specific part!